Arduino Datalogger How To Guide
Arduinos are a great and cheap way of logging data effectively. In this tutorial, we will discuss how to create your own Arduino datalogger that can export directly to Excel and the steps involved in building it.
The best thing you only have to copy some code. No need to write void setup, void loop, or hassle with serial communication, the serial monitor, libraries, and other code.
You just need our test software SAFE.
What is a Datalogger?
A datalogger is an electronic device that records data over time. It typically consists of a microcontroller, sensors, and memory storage. The main purpose of a datalogger is to collect and store data for later analysis. Dataloggers are commonly used in various applications such as performance testing, environmental studies, and scientific research.
Things Needed to Log Data
To create a data logger, you will need the following hardware and software:
- PC with Excel installed
- Arduino board (Uno or Mega) (Does not work with Arduino Nano yet)
- Sensor modules (e.g., temperature sensor, humidity sensor)
- SAFE data logging software
Why use SAFE?
Our test software, SAFE, is specifically designed to efficiently log, display, and export data to an Excel file in real time. This functionality extends to Arduino Uno and Mega as well. Our dedicated team has developed ready-to-use code that can be seamlessly integrated into any project. Simply upload the code to your Arduino board and you can control and log data on any pin instantly.
An alternative option is to utilize an SD card, along with an SD card module, to store data in either a text file or a CSV file. However, we strongly dislike the need to process and analyze data once testing is completed. Our objective is to achieve real-time functionality with minimal effort required. This is precisely what we have engineered SAFE to deliver.
Setting up Your Arduino Data Logger
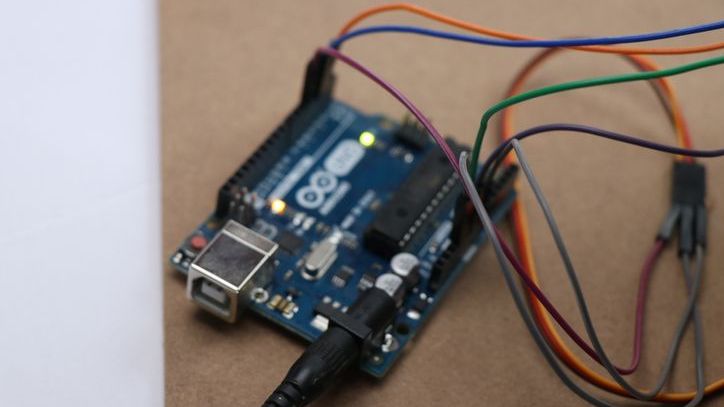
The first thing you need to set up is your Arduino. For the Arduino to become a data logger you must connect the Arduino Uno or Mega with and USB cable.
You do not need any shield. Just a USB cable
Connecting Your Sensors
The next step is to connect the hardware, meaning your sensors to the Arduino. Each sensor will have a specific connection method, so you need to refer to the datasheet or circuit diagram for each one.
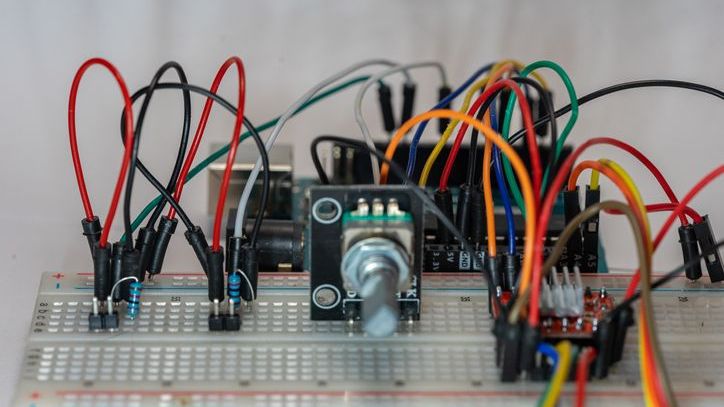
Typically, sensors will be connected using jumper wires to the appropriate pins on the Arduino.
Assuming you have an analog temperature sensor that measures it should for example be connected like this:
- Sensor's Vcc to Arduino's 3.3V or 5V pin (depending on the sensor)
- Sensor's GND to Arduino's GND pin
- Sensor's OUT to Arduino's analog pin A0
Repeat this for all your analog sensors of temperature, light, or other sensors
Once all hardware and sensors are connected, you can move on to uploading the code and configuring SAFE for data logging.
Uploading the Code to Your Arduino
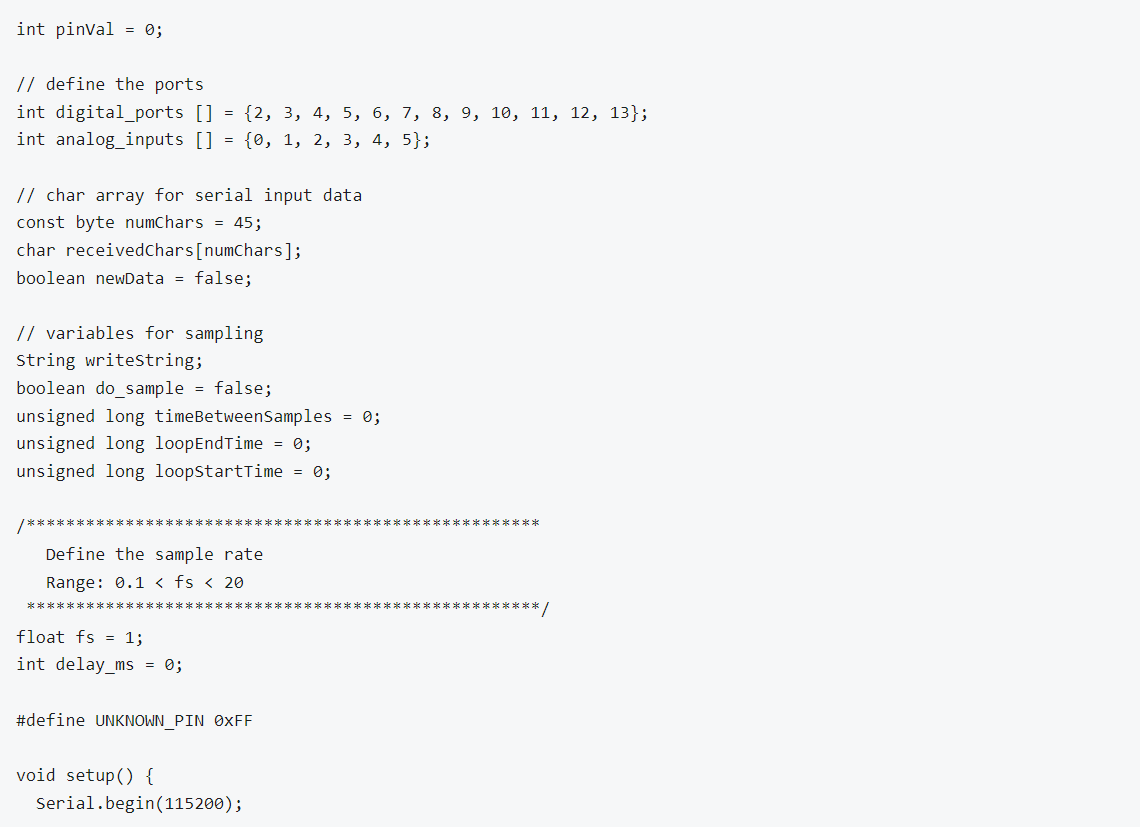
To upload the code to your Arduino, you will need to open the Arduino IDE and copy-paste the latest version of the Arduino program that integrates to SAFE from our website:
This code transfers data from the Arduino to SAFE which can then be used for saving data and exporting. It contains both the void setup function and void loop function and you will not need any additional library or user code for the data logger we are building in this tutorial.
When the code is copied.
Then, connect your Arduino to your PC using a USB cable and select the correct board and serial port in the Arduino IDE. Finally, click on Upload and wait for the process to complete.
Once the code is uploaded, you can open the serial monitor window in the Arduino IDE to see the values being sent in real time.
The serial monitor values should look something like below:
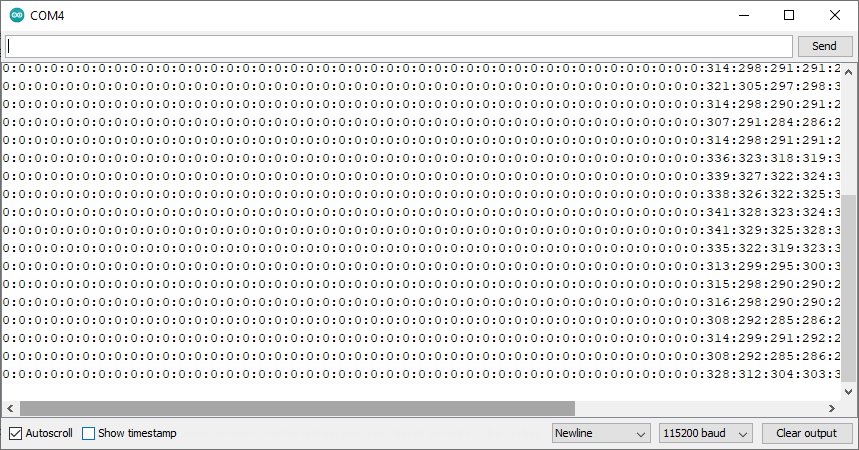
Close the serial monitor and the Arduino side of the data logger should be ready for data logging from any sensor on any digital input pin or any analog input pin.
Installing and Configuring SAFE
Now it's time to install and configure SAFE for data logging
Once downloaded, extract the files and locate "SAFE.exe". Double-click on "SAFE.exe" to launch the program. In the main menu, select “File” then “New project”.
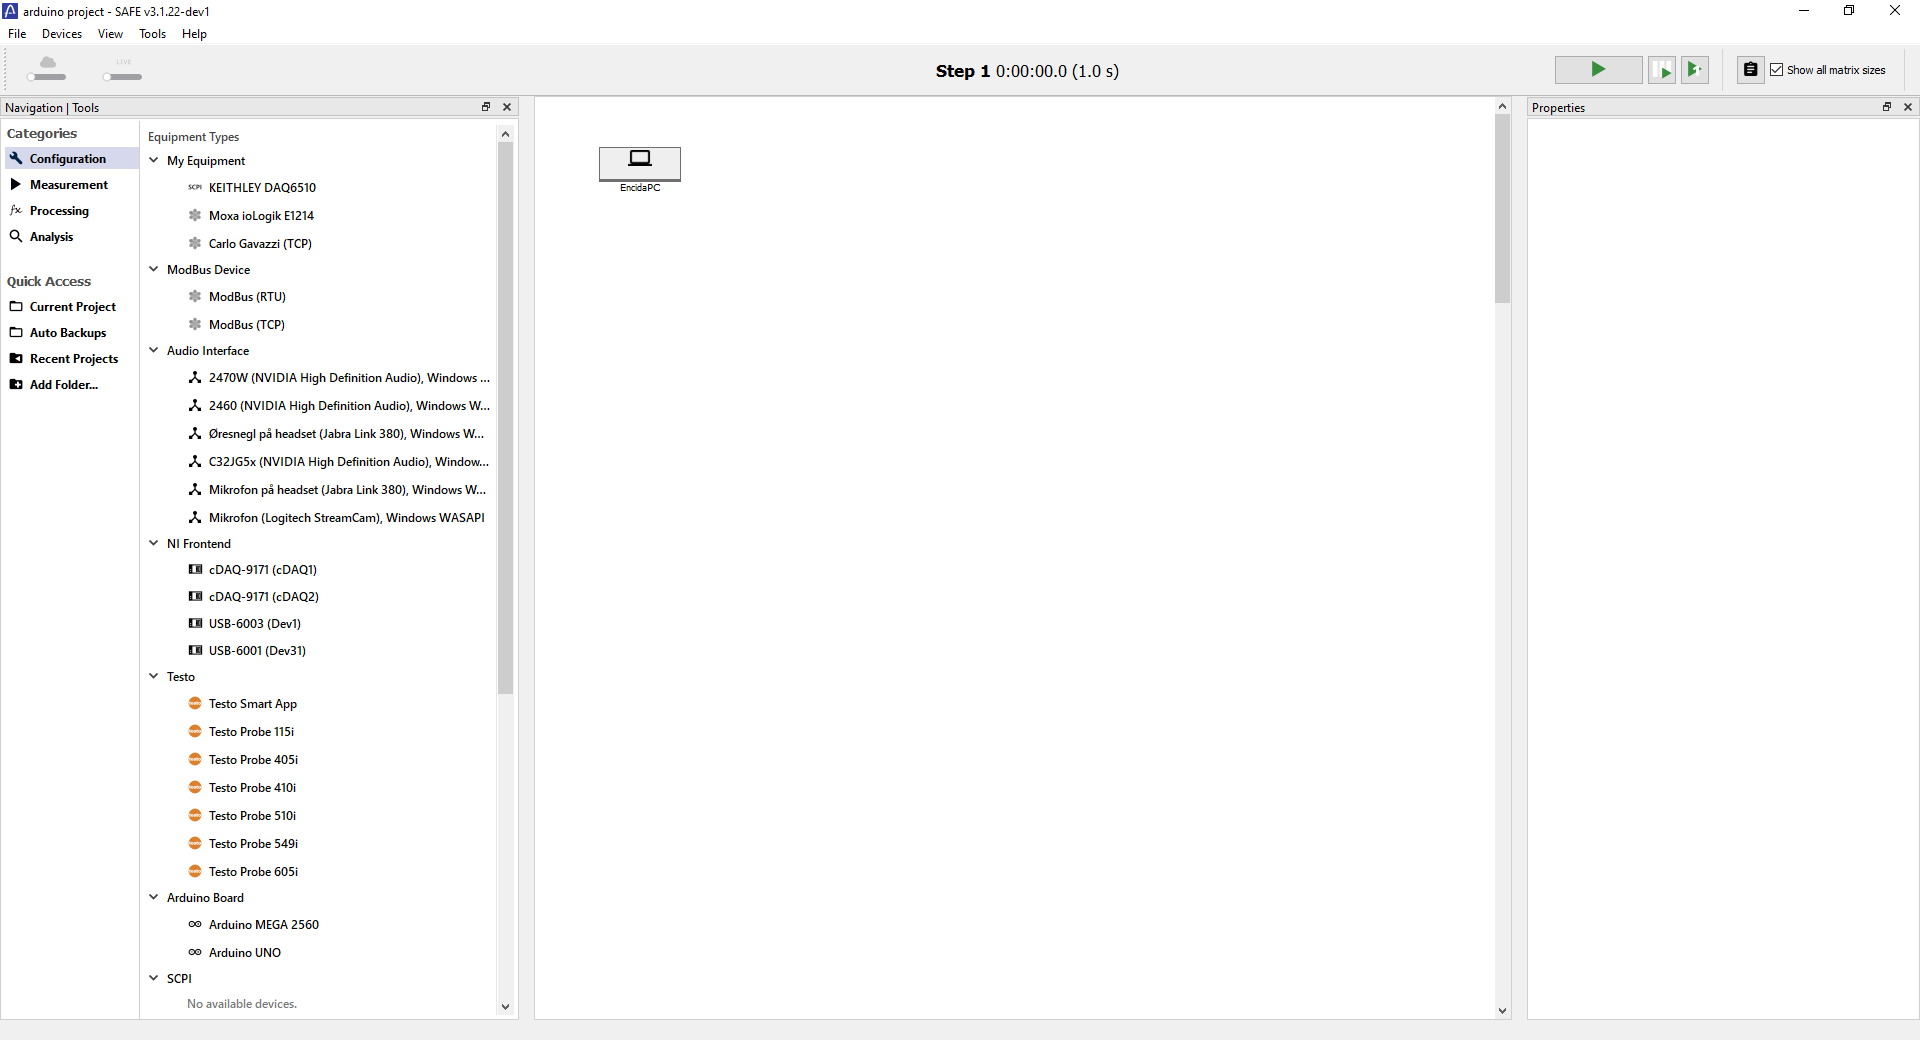
This will open a new project in SAFE and you are ready to go.
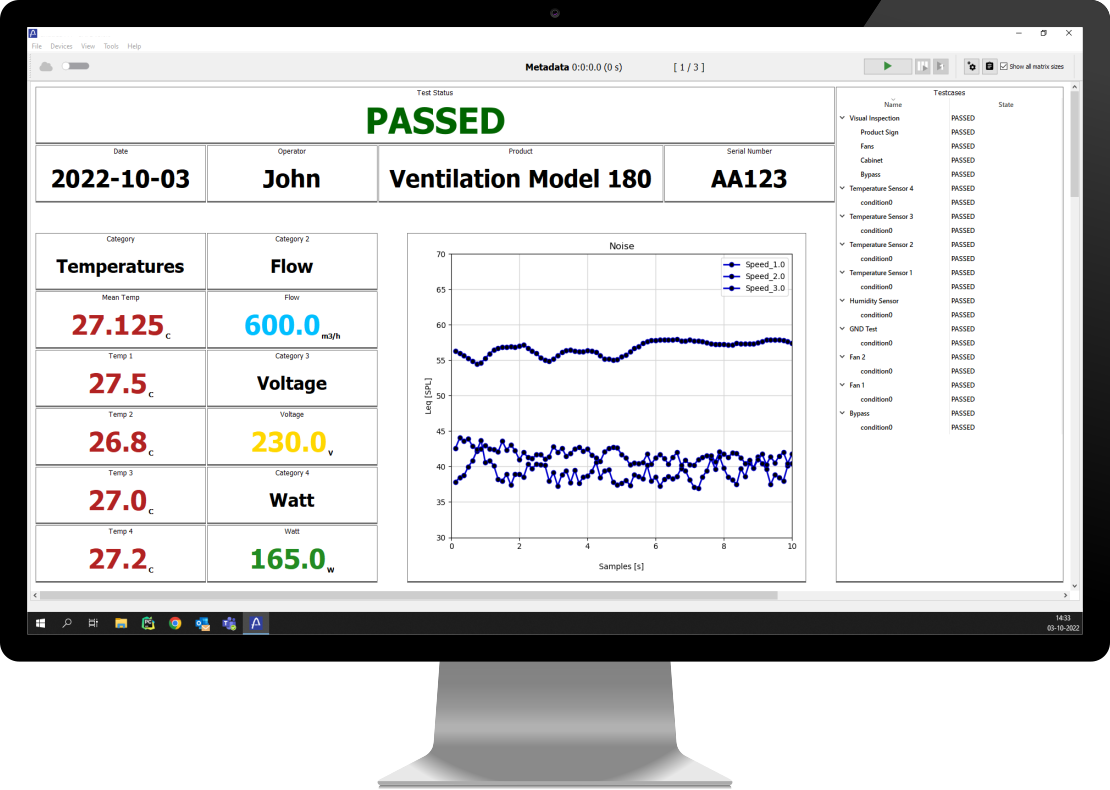
The project should look something like below.
Logging Data with SAFE
To start data logging with SAFE you must configure an Arduino within SAFE.
This is done by dragging an Arduino UNO or MEGA from the list on the left to the board in the center.
You will then get a warning like the one below. That is because you must configure the correct COM port in the list to the right which has all the properties. In my example, I write "COM4". It is the same port as has been set in the Arduino IDE.
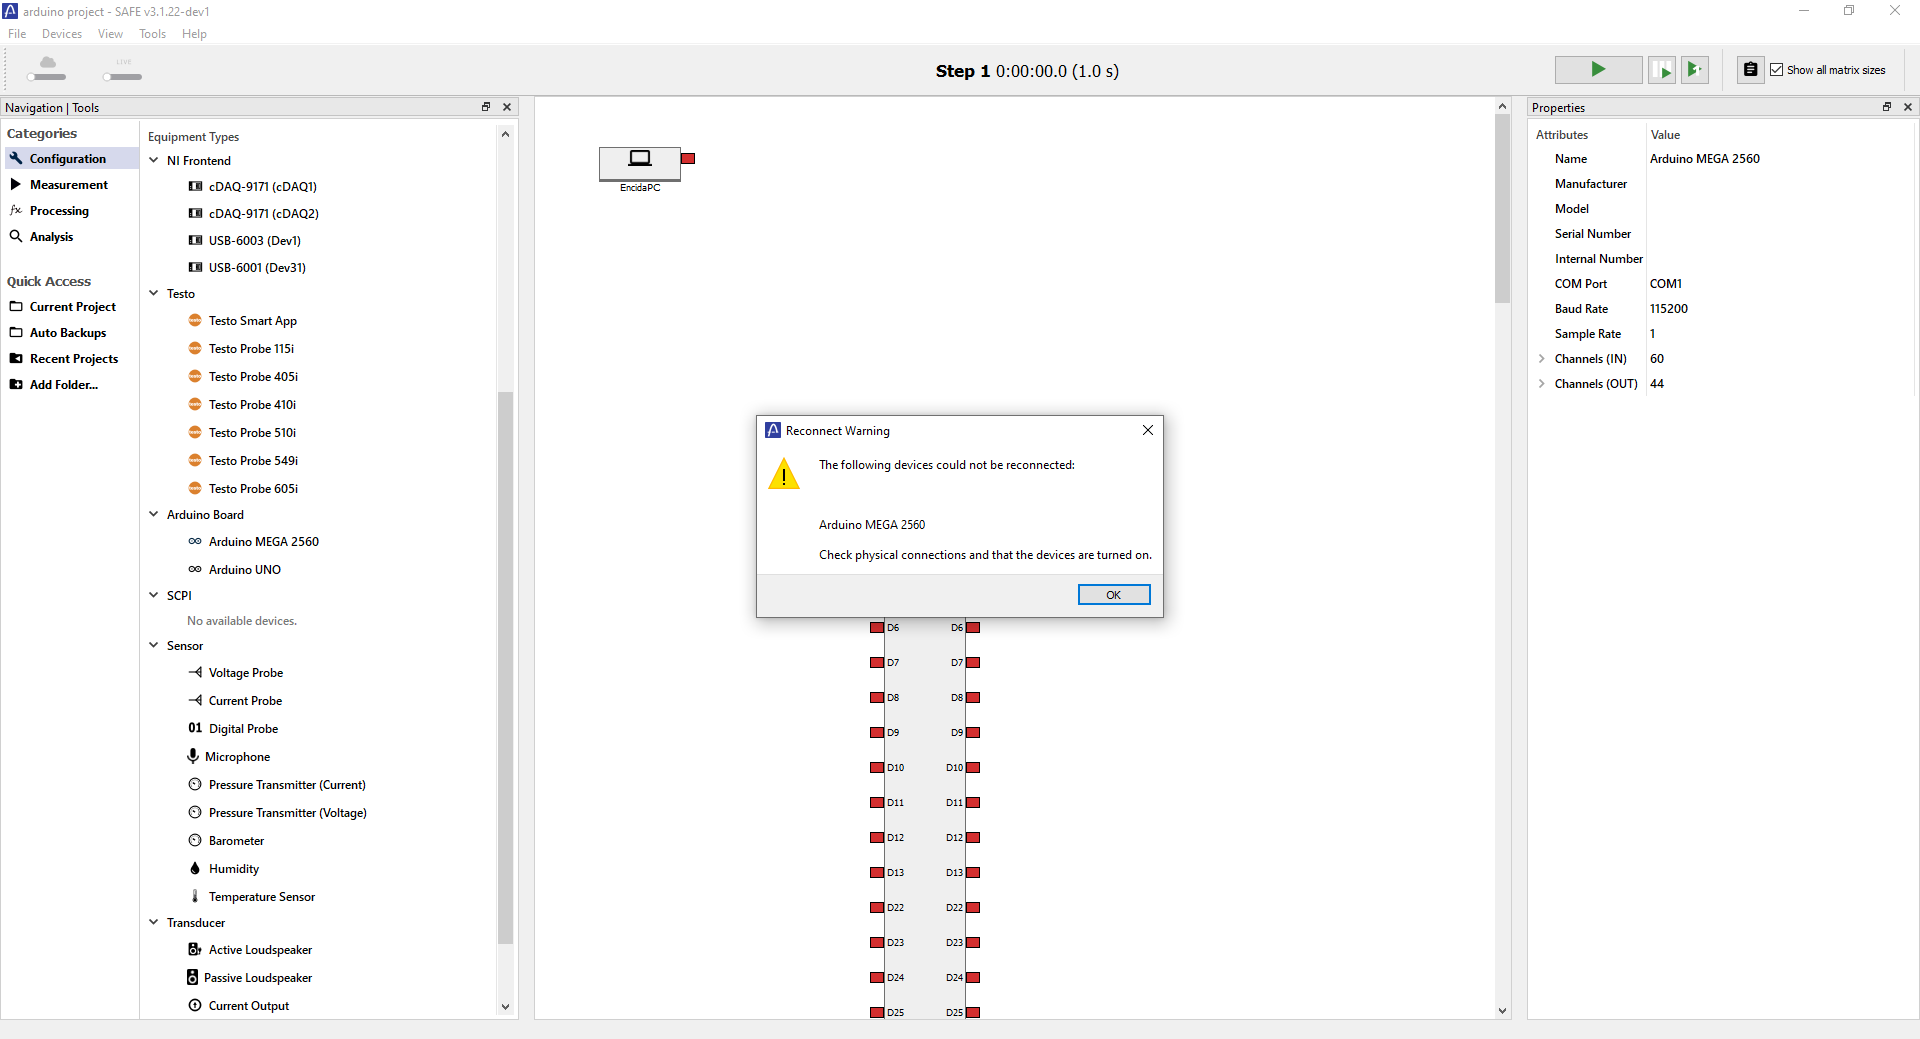
You can then check the device in the top menu "Devices" under "Reconnect Devices". You should see it reconnect by connection between the computer and the device.
Then drag out a "Voltage probe" under "Sensor" in the list to the left.
and draw a line between the "Voltage probe" and the analog input your sensor is on.
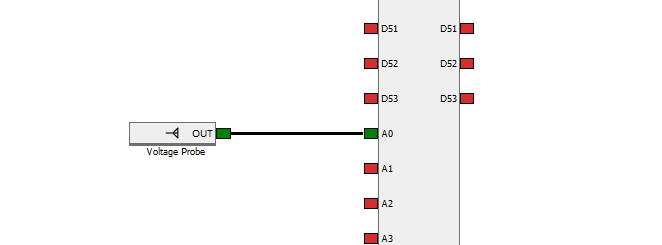
You could of course set up all the sensors you want but for this tutorial, I will just show how to measure with a single sensor.
Next change the category to "Measurement" instead of "Configuration". and drag in an "Analog Measurement" under "Voltage probe" as seen below.

This measurement step measures for 1 second but you can change this to whatever you want by clicking on the step and changing the "Measurement Time" in the properties.
Now you only need a single step to export your values to Excel.
Exporting Your Data to Excel
Go to the "Processing" category.
Drag and drop out the "Export to Excel" block and link it with the Step 1 block.
Should look something like below.
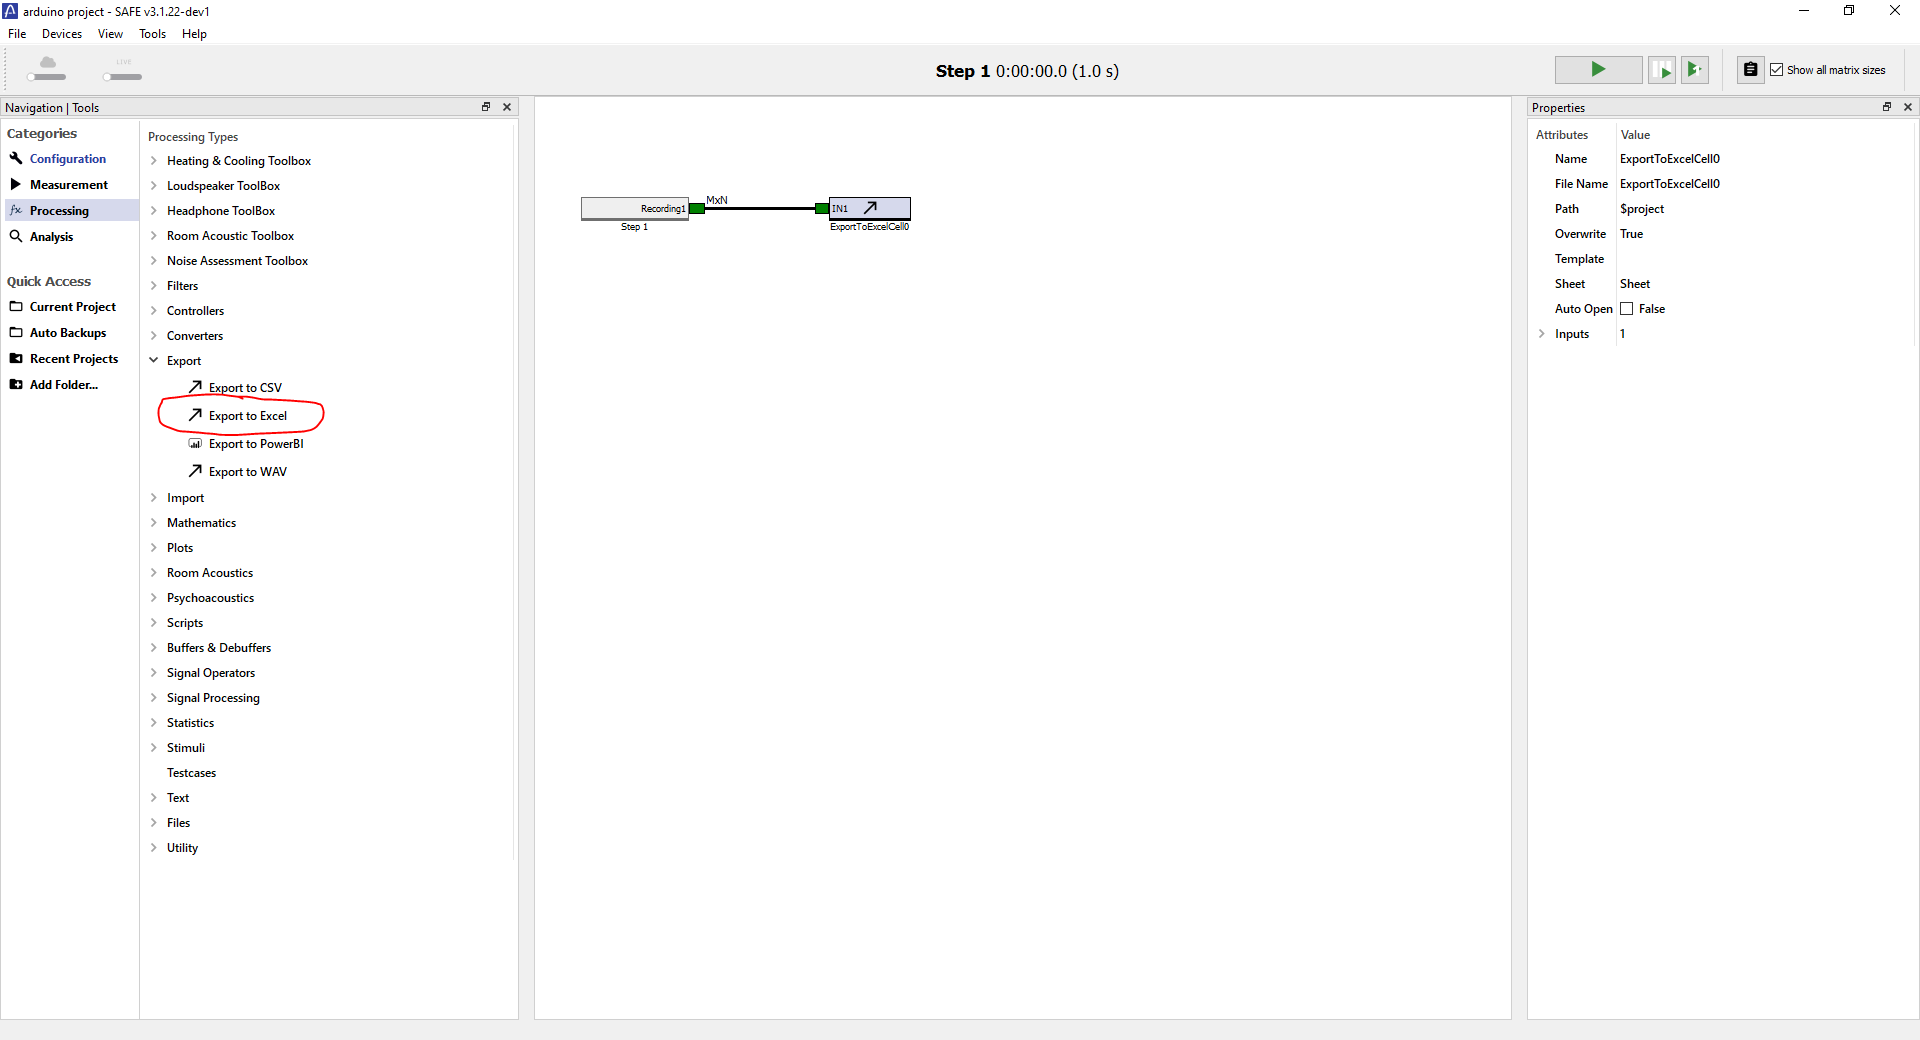
All your values are now exported to cell A1 and down. So A2, A3, A4, and A5 for a 5-second measurement.
One final thing you can do is to change "Auto Open" to "True" in the Excel block properties.
Press play in the top right corner and you test with an Arduino data logger.
SAFE can, of course, do a whole lot more, showing values in real-time, doing multiple measurement steps, outputting voltages, entering metadata, and much more. But that is for other tutorials.
Check out some previous projects here.
Troubleshooting Common Issues
If you encounter any issues with your Arduino data logger, here are a few common troubleshooting tips:
- Make sure all connections between sensors and the Arduino are correct, secure, and not loose.
- Double-check that you have selected the correct board and serial port in the IDE before uploading the code.
- Ensure that SAFE is properly configured to receive data from your Arduino by following the steps outlined in the tutorial.
- Get to know all the Arduino settings in our docs, where you found the Arduino code.
- Send us a message at https://encida.com/contact
By following these steps and troubleshooting tips, you should now have a fully functioning data logger using SAFE. Enjoy logging your sensor data effortlessly with minimal setup required! So go ahead and start experimenting with different sensors and interesting projects to see what kind of valuable data you can collect and analyze with your new Arduino data logging setup.